Showing posts with label Make It. Show all posts

Monday, March 28, 2011

Blind Tutorial

Do your projects get done before "company is coming"?

I had been thinking about this project for a while and managed
to get them done in 4 hours one evening before an informal get-together 
at my house.  Whew!  (Thank goodness for deadlines!)


Friday, March 25, 2011

Smothered Tacos w/ Natalie's Enchilada Sauce

My "Make It Marvelous" March is quickly coming to a close!  
We've been "Spring Breaking Stay-cation Style" and busy with a few small DIY projects lately...
Here is a great recipe that completely makes my day!  I hope you try it and love it, too!

Natalie at Endless Crafting posted this (so. so. good.) Enchilada Sauce recipe
and I'm completely addicted.  Like scooping-it-up-out-of-the-pan-with-taco-chips-addicted - so delicious!  (Canned Enchilada Sauce?  Never again!)

Sure, you can make enchiladas and pour the sauce generously over the top
- or -
you can Fry. A. Taco. and smother it with the sauce!
(Oh. Dear.)

What I used:  
White Corn Tortillas, 
Black-Eyed Beans,
Shredded Cheddar-Montery Jack Cheese
Brown Rice, 
Verde Salsa (surprisingly tasty - from Wal-Mart's World Table brand)
Heat about 2 Tablespoons of oil. 
('Til it sizzles when you drop in a bit of water-carefully!)
Drop in your shell.  
(I fry -and salt- both sides.)
(There are certain chemical imbalances I just MAY be making up for here.) 
(Admission. That would be Step 1 in my recovery process, thank you.)
Fill with your choice of toppings. 
(I also had cilantro on hand this particular day - Can we get an "Oh. My...!")
Fold and then for the magic step...
Cover - 
and remove from heat 
to allow optimal melting into warm yet crispy deliciousness.
(Re-heat your Enchilada Sauce, if necessary.)
More cheese, more cilantro.


Then smother with enchilada sauce, 
more cheese and more cilantro.
"Wah-Ha-Ha".  (Maniacal laughter.)

You'll want to pick this up at the counter and 
let the sauce drip down your arm while you gobble it down.  

However, if you manage to make it to the table, with a fork, 
you'll get fewer strange looks from the (non-taco-enchilada-eating) family 
(What is WRONG with them, anyway?)

 So delicious... So good...So Marvelous!

Stop by Natalie's blog and print yourself a copy - Only your thighs will regret it!

Thank you, Natalie!

Make It Marvelous, People!

Wednesday, March 2, 2011

Simply Marvelous

"It is always the simple that produces the marvelous."
Amelia Barr


A simple (easy) recipe for simply marvelous cleaning:

My lovely aunt, who is clever about coming up with healthy ways of "keeping a home," gave me this recipe  for Lavender Spray.  

Use it to refresh linens, clean the bathroom or remind you of walking through a spring field...:)


Lavender Field - County Wicklow - Ireland Painting  - Lavender Field - County Wicklow - Ireland Fine Art Print
Lavender Field - County Wicklow - Ireland - John Nolan, Artist

Maybe you have a local organic food and product store nearby - I purchase  Lavendar Oil at The Tangerine, a marvelous little organic food and product store in my hometown.


Lavender Antibacterial Spray

1 cup warm water
10 drops lavendar essential oil

Combine the water and oil in a spray bottle and shake well to blend.
To use, spray into the air or on the surface you are disinfecting.

(We use this just before bedtime on the kids sheets, too - a very light spray and off to dreamland!)

Make it Marvelous!

Monday, February 21, 2011

Can We Make Cookies?


As a young baker I memorized the Chocolate Chip Cookie recipe on the back of the Nestle's Chocolate Chip package.  Whenever I made them, though, they usually turned out MUCH to flat, sometimes even running together on the pan!  

During my lifelong  J  search for the "perfect chocolate chip cookie recipe",  I've found a couple recipes that turn out crispy, soft, buttery and delicious.

The recipe below is from a pretty food blog called Vanilla Sugar  (I modified it just a tiny bit).  

The original recipe uses cold European butter that you grate, then put back in the fridge, then take out and combine with the sugars and eggs when ready. 

Those additional steps make for a great-stand-up-cakey cookie, but there were too many additional steps for me (and my lack of ability to attend to the task!).  My modifications are REALLY slight, but, I think, helpful to those of us who want our cookies delicious and have:
a) no patience 
b) famished children
c) low blood sugar
d) other reasons we don't want to discuss, OK?!

Here it is (Ta-Da!):

Chocolate Chip Cookies
2 sticks salted butter, room temp/softened 

3/4 cup granulated sugar 

3/4 cup packed light brown sugar 

2 large eggs 

1-teaspoon vanilla extract 

3 cups all purpose flour

3/4 teaspoon sea salt 

1 and ¼ teaspoon baking powder 

1/2-teaspoon baking soda 

12 ounces (2 cups) semisweet chocolate chips or chopped chocolate 


In a mixing bowl, beat butter and both sugars just until just combined. 

Add the egg and vanilla and beat just until incorporated. 


In separate bowl, stir together flour, baking soda, baking powder and salt.   

When thoroughly mixed, add to batter and stir just until blended.

Stir in chocolate chips.

Using small cookie scoop, mold into tablespoon sized balls.

Keep them as balls on the cookie sheets. (Don’t flatten.)

Chill dough balls for 20 minutes BEFORE baking. 


Bake at 365 degrees for 8-12 minutes (or until done).

Makes about 12 cookies


My favorite vanilla from Penzey's Spices


Here are some "tips":
(In other words, ignore me completely and/or use what works for you!)
  • When working with my kids:  I like to measure the dry ingredients out first, then give the bowl and a fork to one child to stir.   The other helps with the sugar/butter mixture.  Then, they each get to crack an egg! (Good thing I've got just two helpers!) :)

    • I’ve found that room temperature butter (soft, not melted in any way), mixing by hand, and chilling the dough, makes a crispy yet soft on the inside cookie.
    • (In a pinch, I have used butter that I softened (with a portion melted) in the microwave and the cookies did not “stand up” – they flattened right out – even after the cool/freeze step.)

    • I use the bits of butter on the butter wrappers to grease the pan/s.
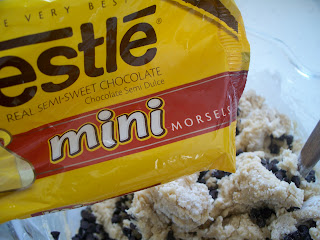
    Mini Chips are my favorite!


    • If you love nuts - go ahead and add 1 cup!
    • When you add the flour mixture, the dough will be quite dry/stiff – don’t be alarmed (and try not to “overwork” the dough when forming into the cookies).
    • I’m much to impatient to form every single cookie into a ball- and I tend to end up with a “tough” cookie when the “form into a ball” step takes place.  So, I fill my small cookie scoop (1-1/2 in.) to just the top, or use two teaspoons (the spoons you use on the table) to shape the cookies.
    Ready to chill, then bake.


    • More impatience - I “chill” the cookies in the freezer –until they firm up – then bake.

    • Possibly my favorite tip is from Vanilla Sugar:  Bake at 365 degrees (about 8 minutes for frozen or chilled cookie dough has worked for me).  Love this temp with this recipe!

    • When making to bake another time, I freeze the cookie dough balls very close together.  (I save this "disposable" pan just for this purpose- it's lightweight- goes right into the freezer, and I won't have to be without my favorite pan/s while they are freezing.)  
    • When frozen, I toss ‘em in a labeled Ziploc bag- (with time and temp directions).   The frozen lumps of dough make a great gift! (And a not-so-great snack for a sneaky 6-year old!)
    • Baking Zen:  I try not to bake if I'm distracted or angry...much less frustrating and things DO turn out better! 


    Enjoy with someone you love!


    Thursday, February 3, 2011

    Coat Rack

    Isn't this a great idea?
    2011-amenitycoatrack copy.jpg
    Muir Wall Coat Rack by Amenity Home


    This coat rack has a slot to put notes, mail, permission slips as you're heading out the door ...very smart (and possibly and "easy" DIY...hmm...).


    Saturday, January 29, 2011

    How Wrong Would It Be?

    I had leftover Cowboy Calzone meat mixture (from this awesome cookbook) and
    leftover garlic bread...(you know, you get two slices, you eat one, the other floats around the freezer reminding you of it's garlic-y deliciousness in it's partially-opened package...'til you come up with a really great plan, that is!)

    Well,  I was going to smack those leftovers together, top them with MOZZERELLA and BAM! Pizza Bread! Yee-ha!

    People would cheer!  MY people would cheer!  They'd love me!
    "Mom, you're the BESTest!" they'd exclaim!
    Matt Groening
    Well, Homer, you're out of mozzarella!

    (You see, in another frenzied attempt to make something that my family will eat - other than the two recipes I already prepare - I made lasagna.  PW's lasagna.  Meaning LOTS of MOZZ was used...2 pans of lasagna were made.  One partially consumed by said family, one frozen and given away.  Though I happen to LOVE lasagna - think Garfield - we still had leftover lasagna.)

    That's when this thought crossed my mind:
     "I could peel the mozzarella off the leftover lasagna!"

    I love it when a plan comes together!